
myTurn supports multiple forms of Single Sign On, including OAuth / ODIC, SAML, SIP2 (public libraries) and other methods on select subscription plans.
The general instructions for setting up OAuth 2.0 for Google Workspace, Google for Education, and other Google managed services can be found at the Google Cloud Platform Console Help:
https://support.google.com/cloud/answer/6158849
The instructions below are specifically for configuring you OAuth consent screen and other settings with myTurn. Google often changes their documentation and user interface, and these instructions and screen shots were current as of May 2022.
Instructions
1. Login to the Google API Console at: https://console.developers.google.com
2. Click on the down arrow/triangle next to your organization name in the upper left corner of the screen and then click on "New Project"
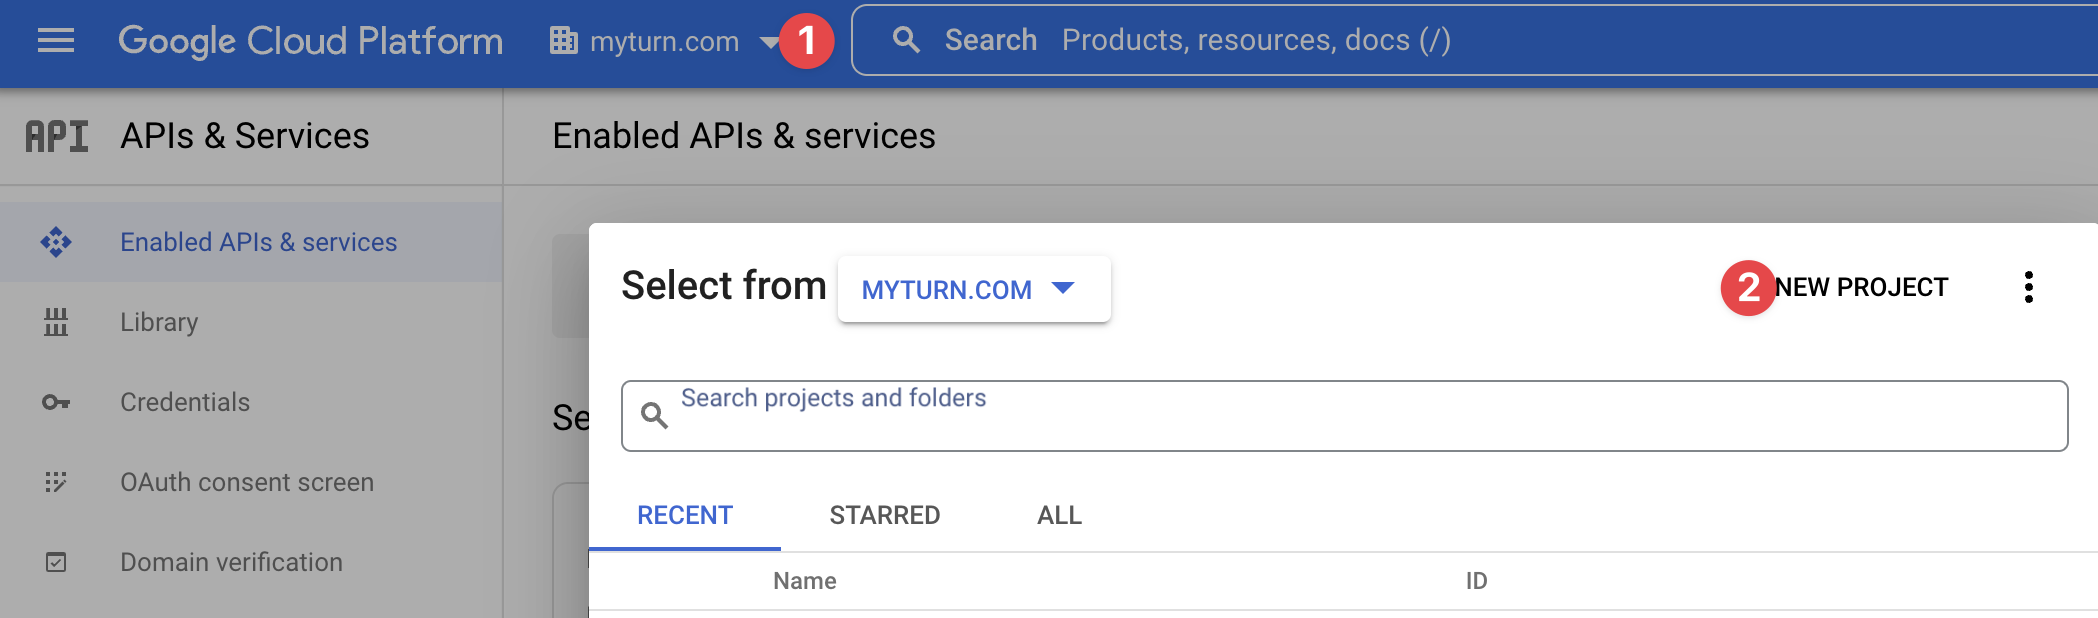
3. Give the project a name (e.g. "myTurn Platform SSO") and make sure the correct Billing Account, Organization, and Location are selected and then click "Create" at the bottom.
4. Select the"myTurn Platform SSO" project in the pop-up from Step 2 if the new project is not already selected (it should be already selected).
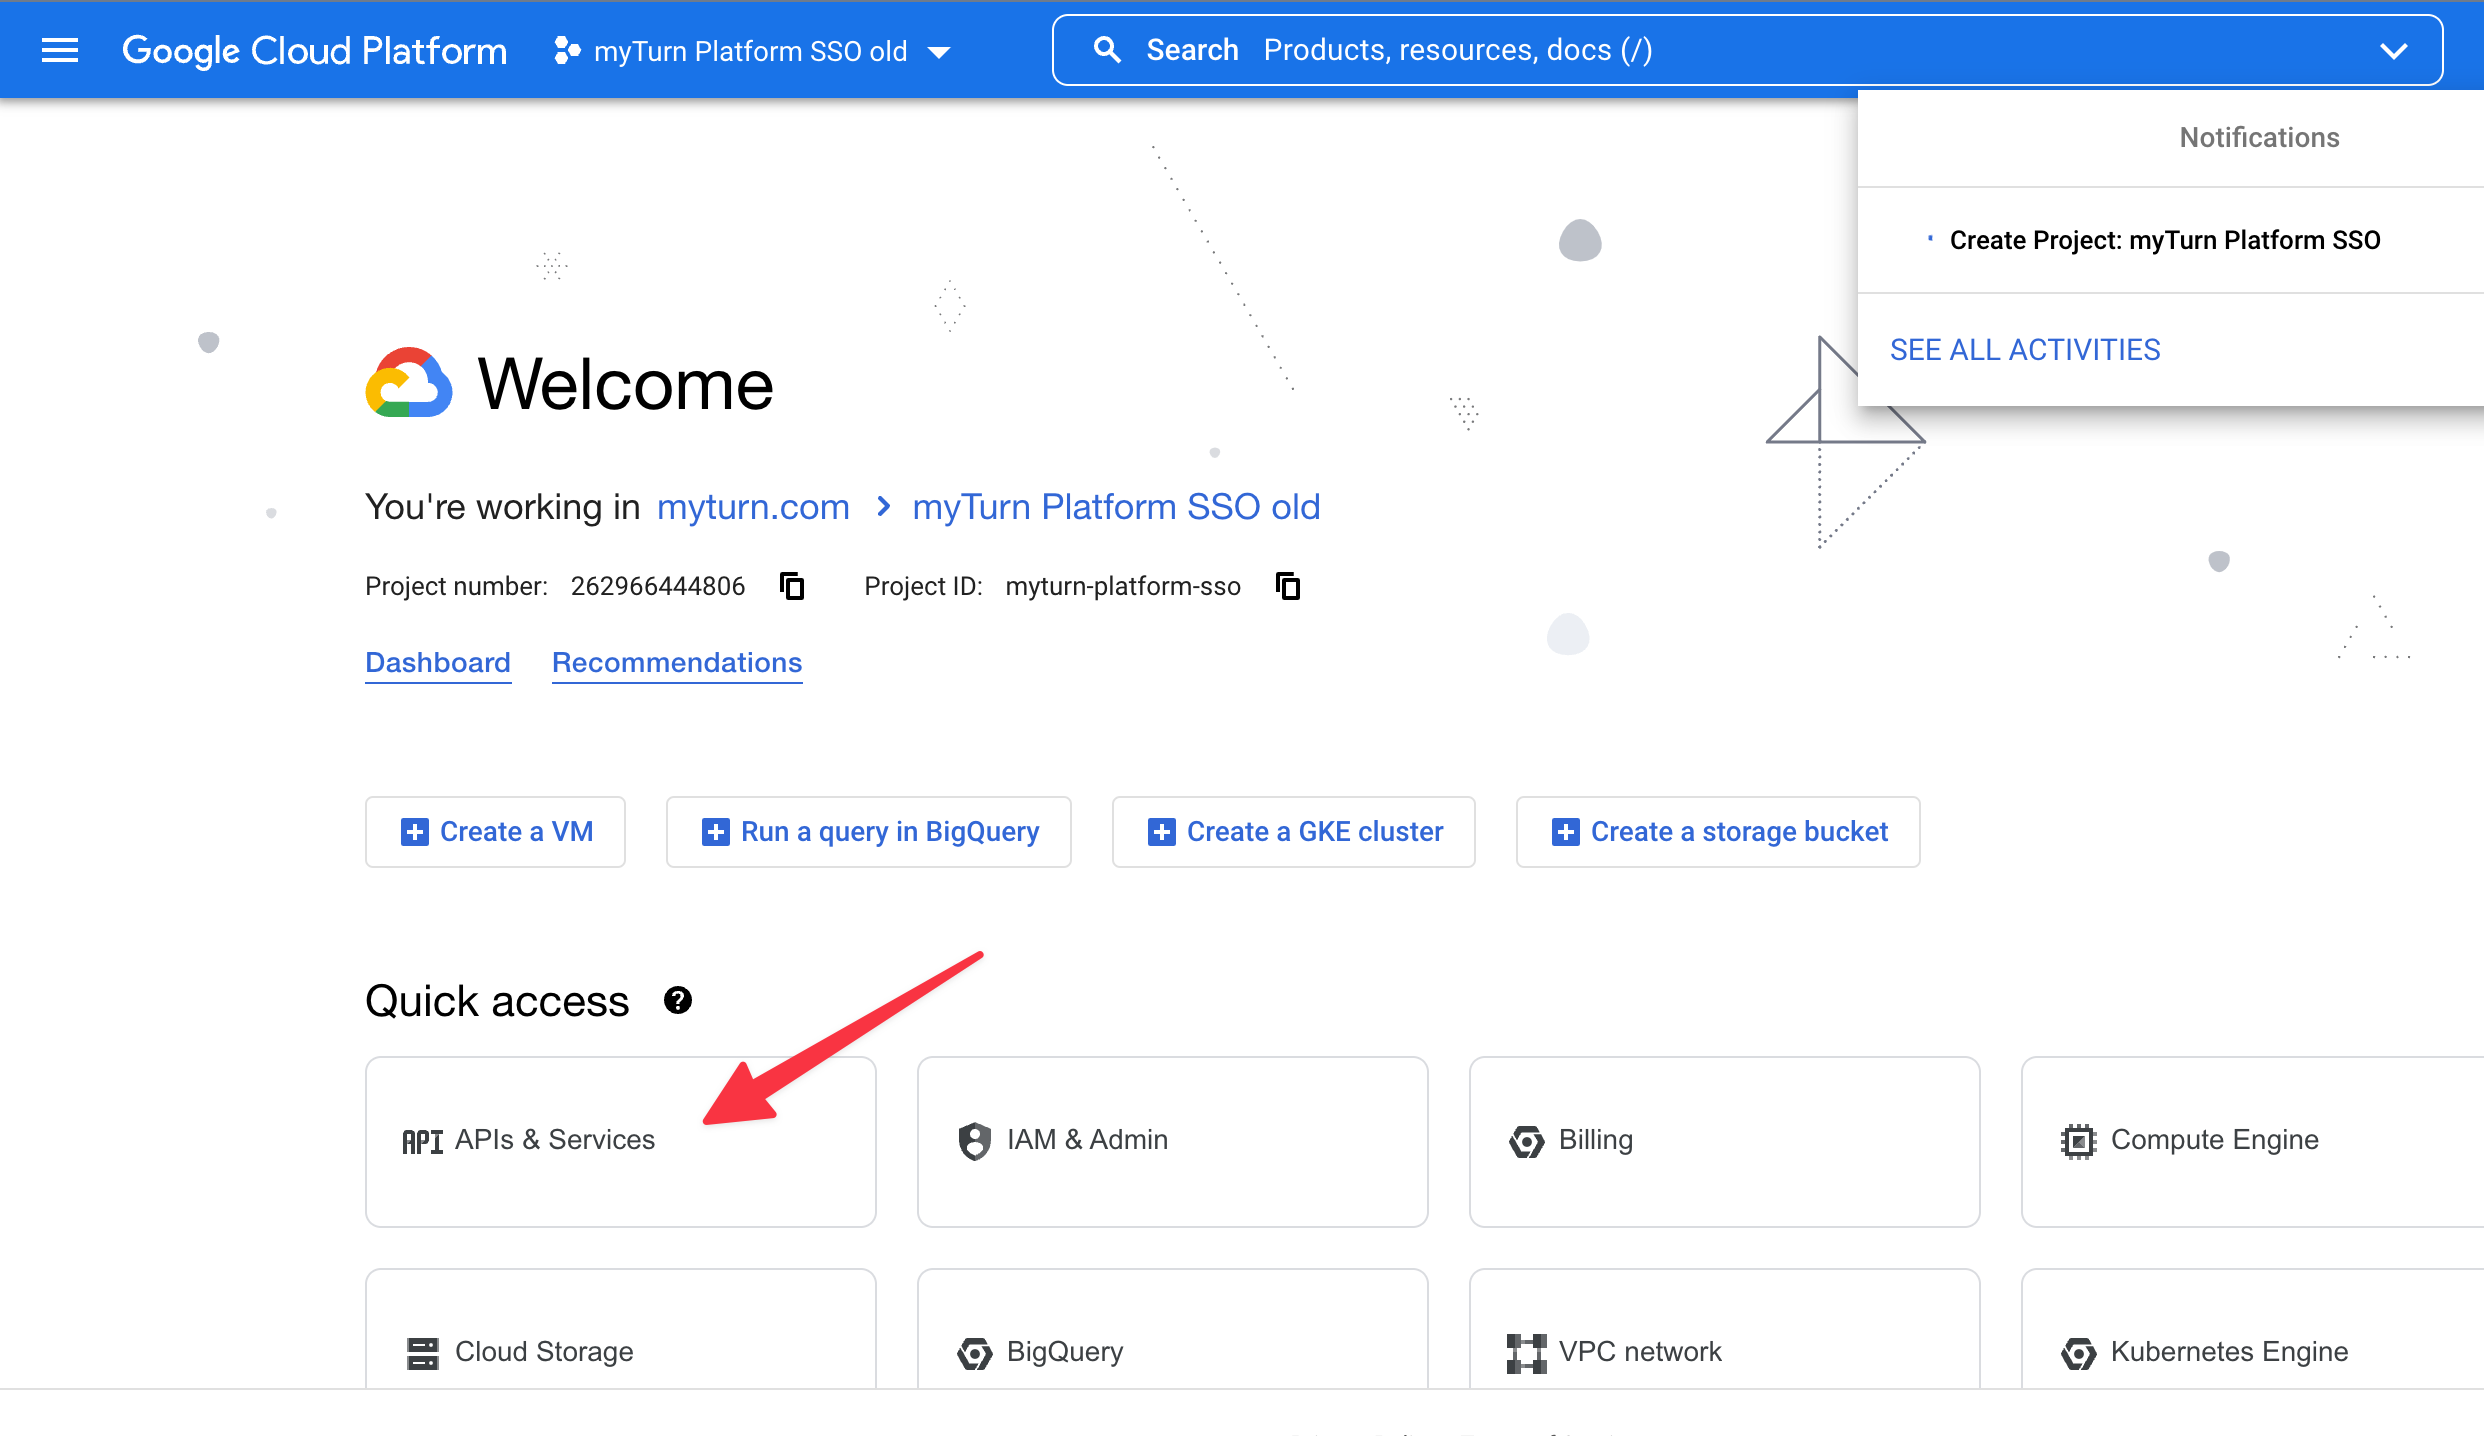
5. From the Welcome page, click on "API & Services"
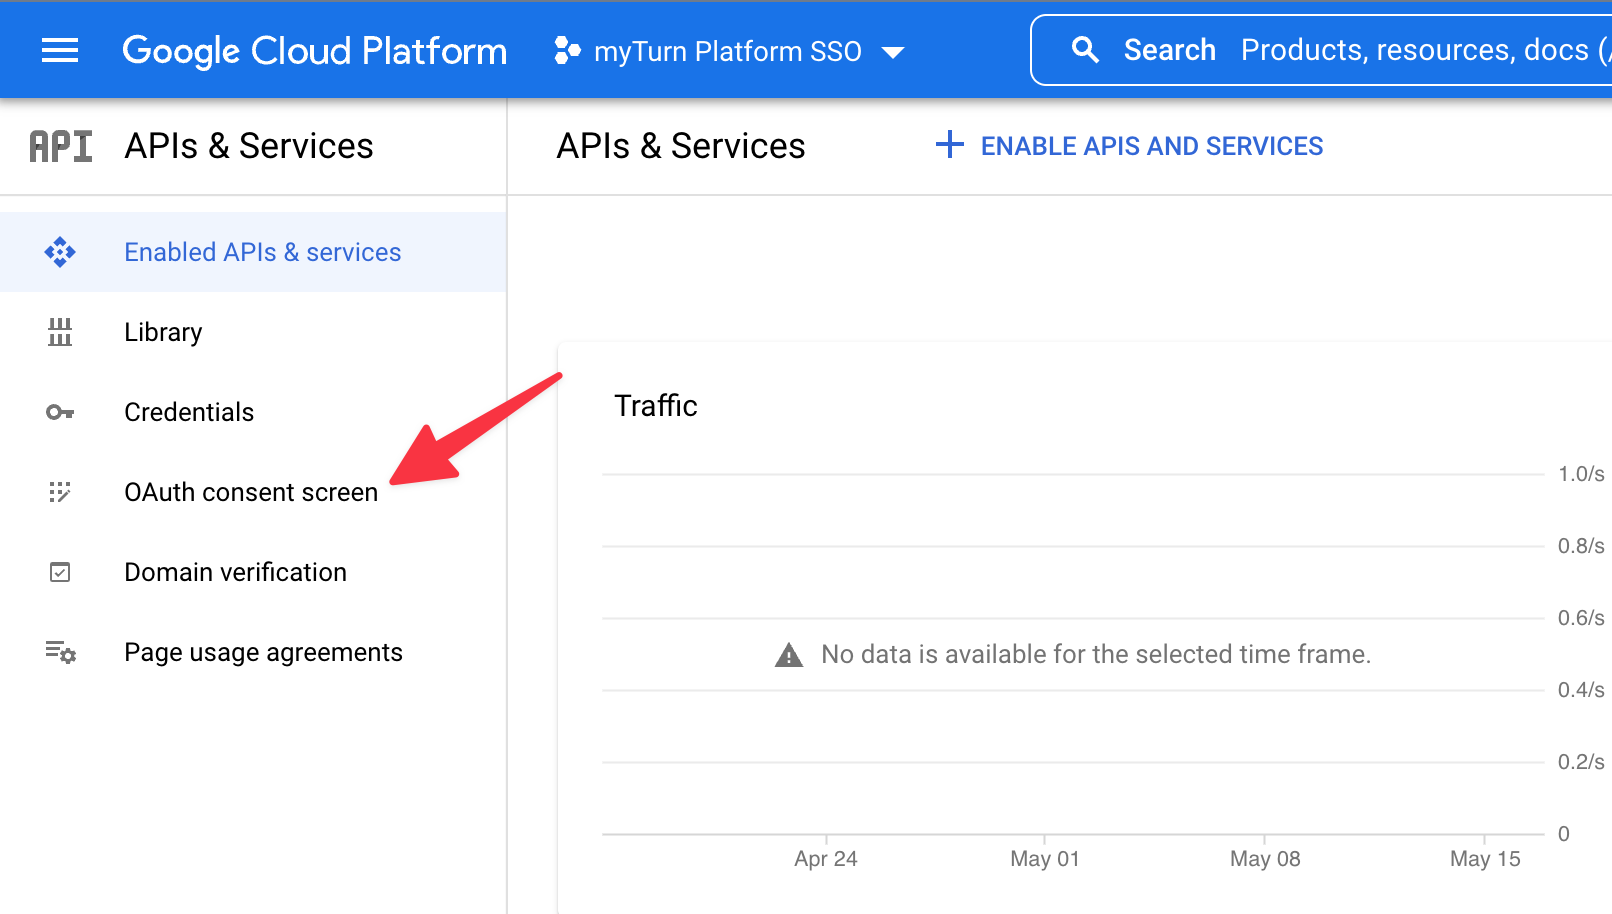
6. Click on OAuth consent screen to start the process of configuring the login page your users will see when logging into myTurn and your OAuth integration
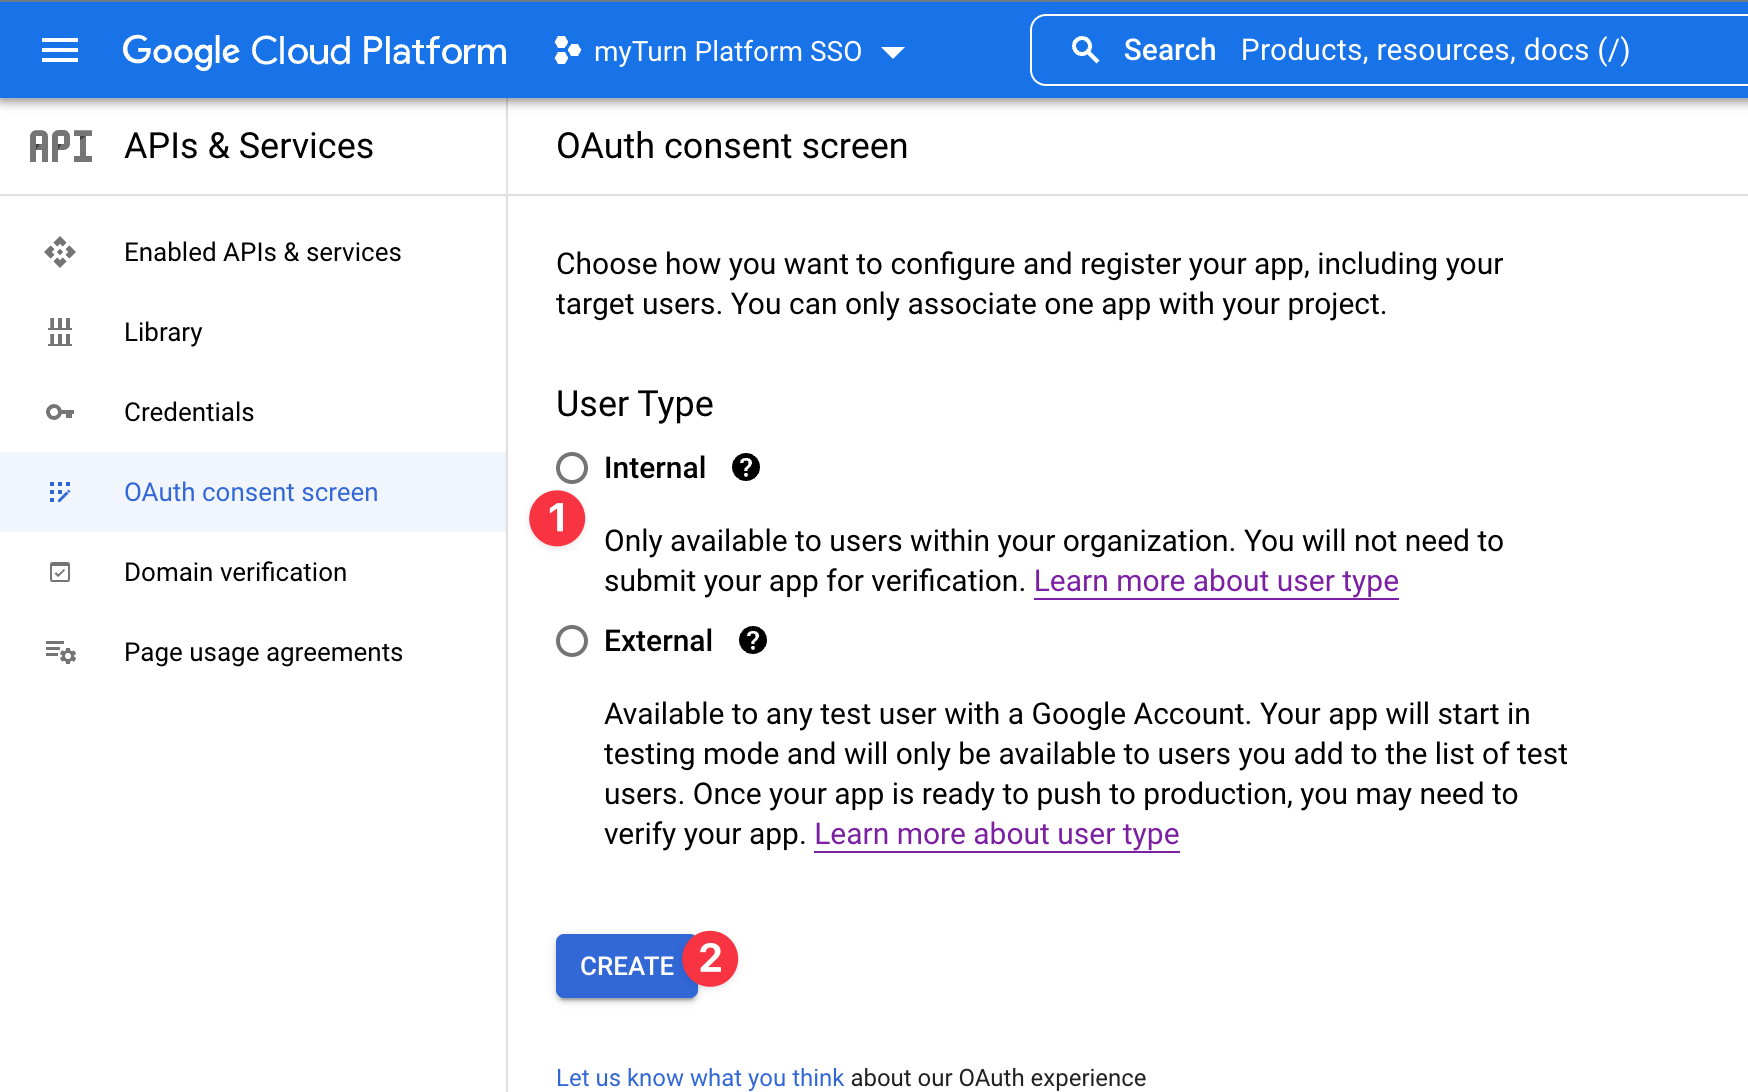
7. For "User Type" select "Internal" and click "Create"
8. Fill in the information about your integration (these settings can be changed/tweaked later if needed)
App Name: this will be displayed to users, and can be something like "Lending Library"
Authorized Domain: myturn.com
You can also optionally add your or our logo to the login page (our logo can be found at: https://myturn.com/brand-guidelines/)
Click "Save & Continue"
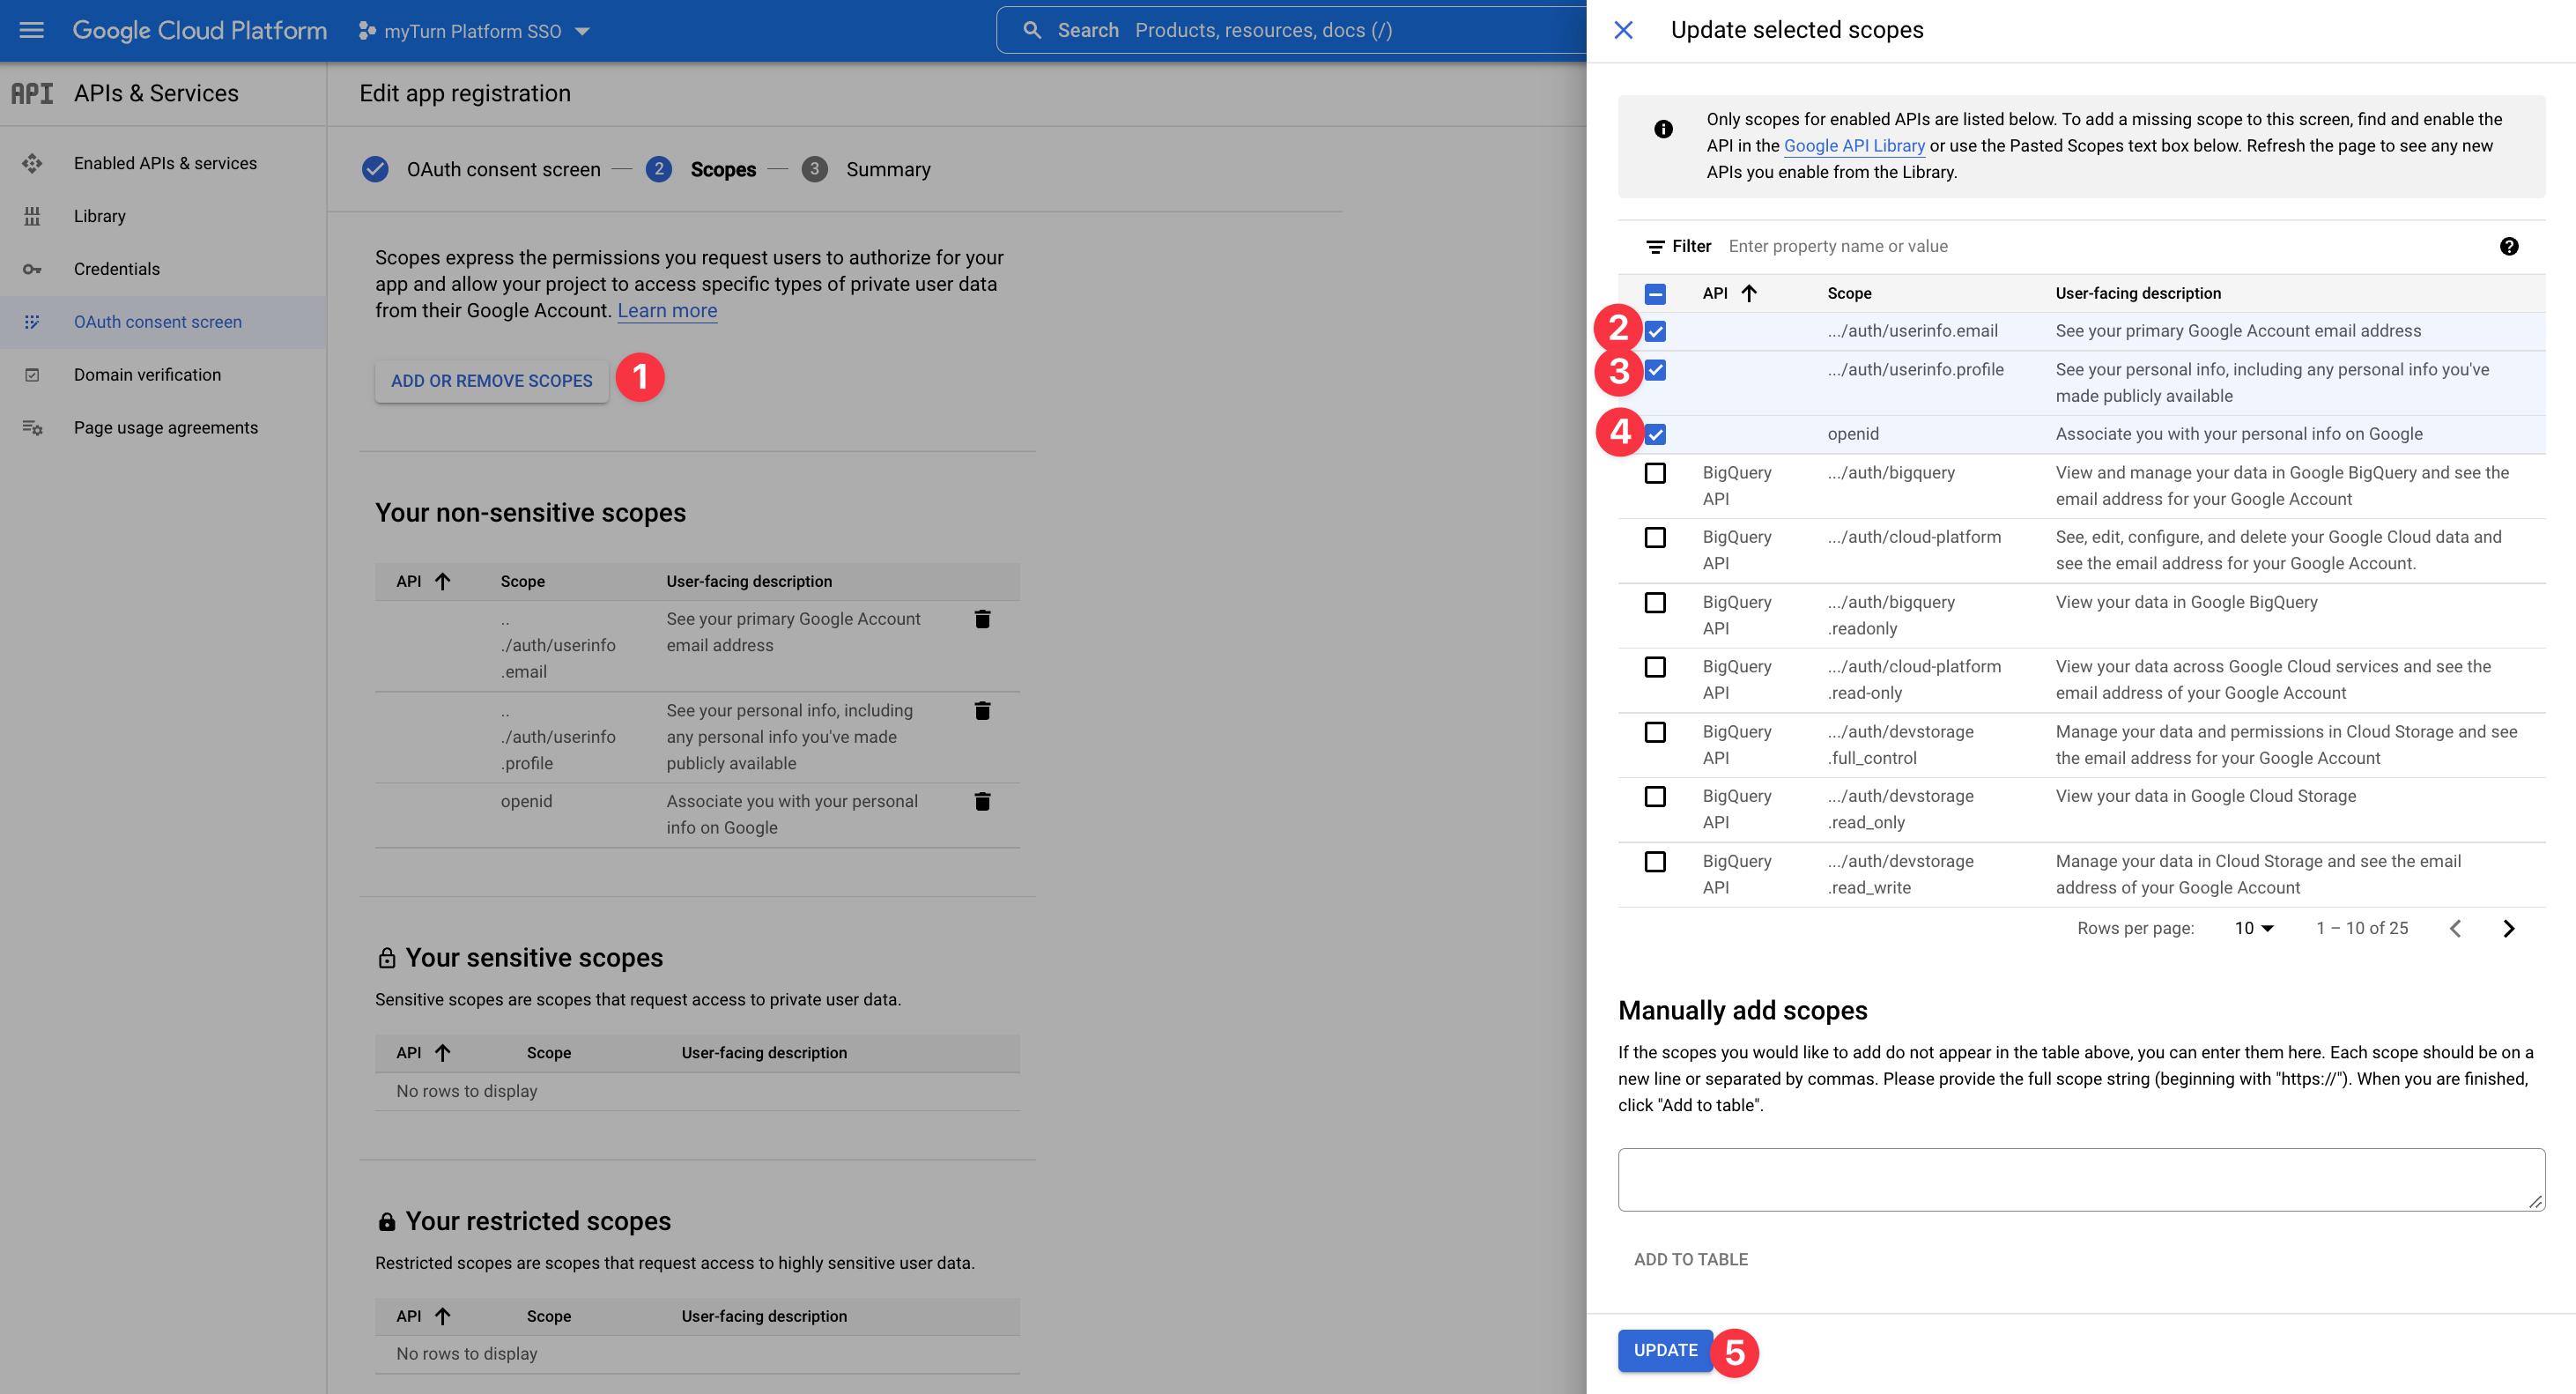
9. Scopes define what information will be sent to myTurn during login. We recommend selecting the first 3 scopes which are all “non-sensitive scopes”then click Update at the bottom of the right panel.
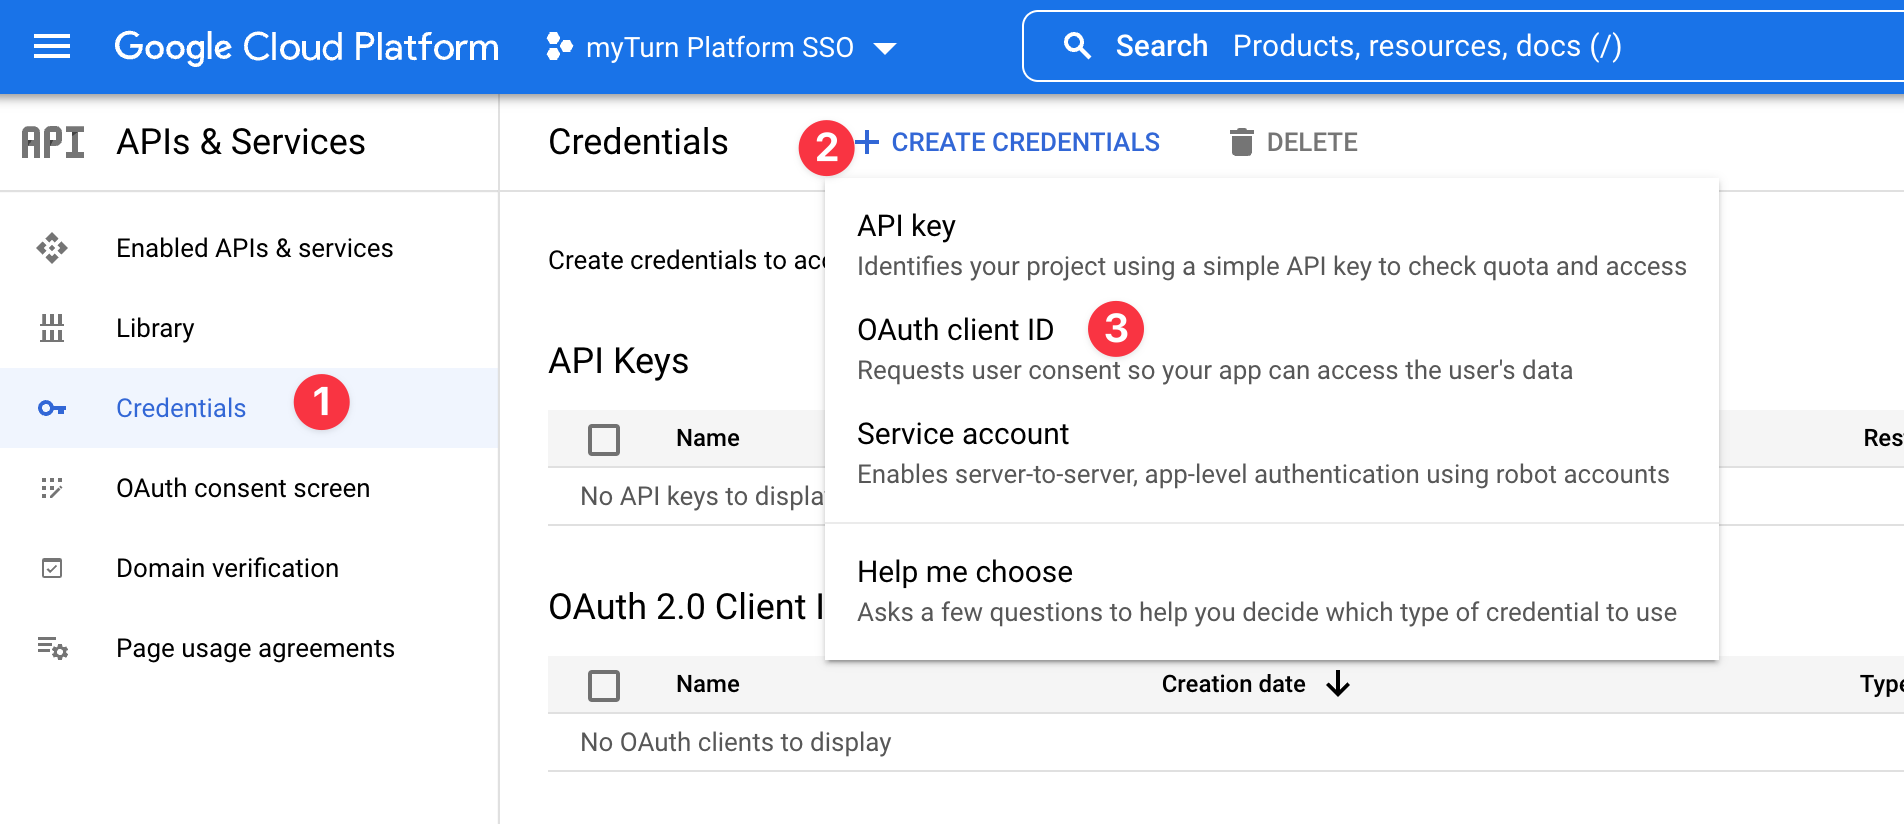
10. After saving the Scopes, click "Credentials" in the left navigation, then "+Create Credentials" and "OAuth client ID". This will start the process to create the key/IDs needed to configuration your myTurn site
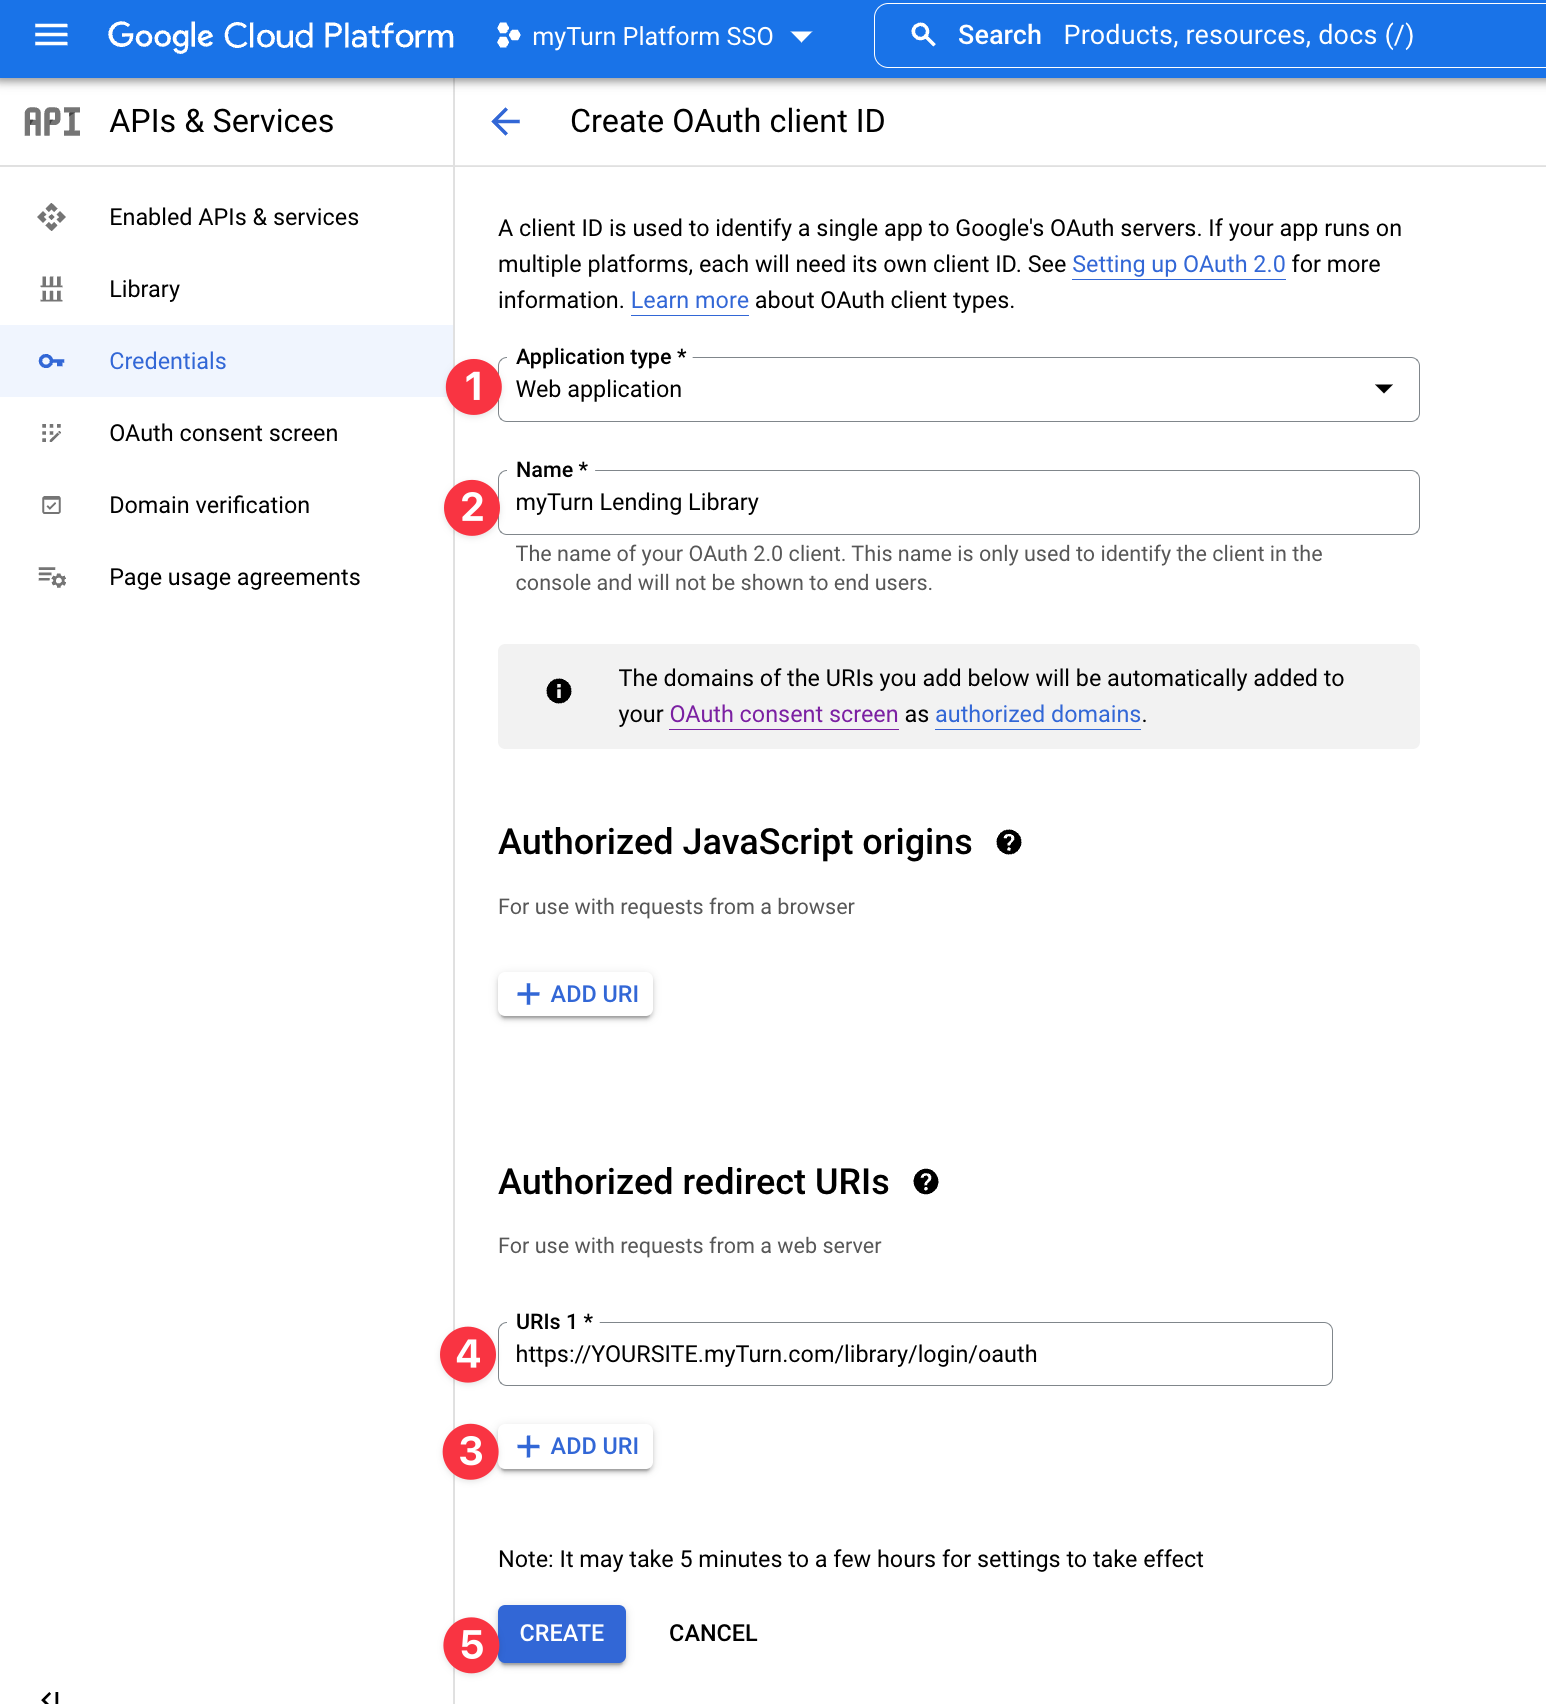
11. Configuring Credentials, set the following values
Application Type: Web application
Name: myTurn Lending (or similar, this is to help you identify the credentials and is not displayed to users)
Authorized redirect URIs: https://YOURSITE.myTurn.com/library/login/oauth
Important, change "YOURSITE" to your actual myTurn site name/URL
then click "Create" at the bottom
12. This will give you the Client ID and Client Secret which are needed to complete the OAuth 2.0 OIDC setup on the myTurn site.
Comments
0 comments
Please sign in to leave a comment.